Thermal Printer Module
Learn how to setup the thermal Printer Module
Install
After you have downloaded the code from CodeCanyon, log in to your admin panel as admin and go to the "Apps" section. there is an "Add" button where you can upload the zip file you got from CodeCanyon.
How to install pluginSetup as project admin
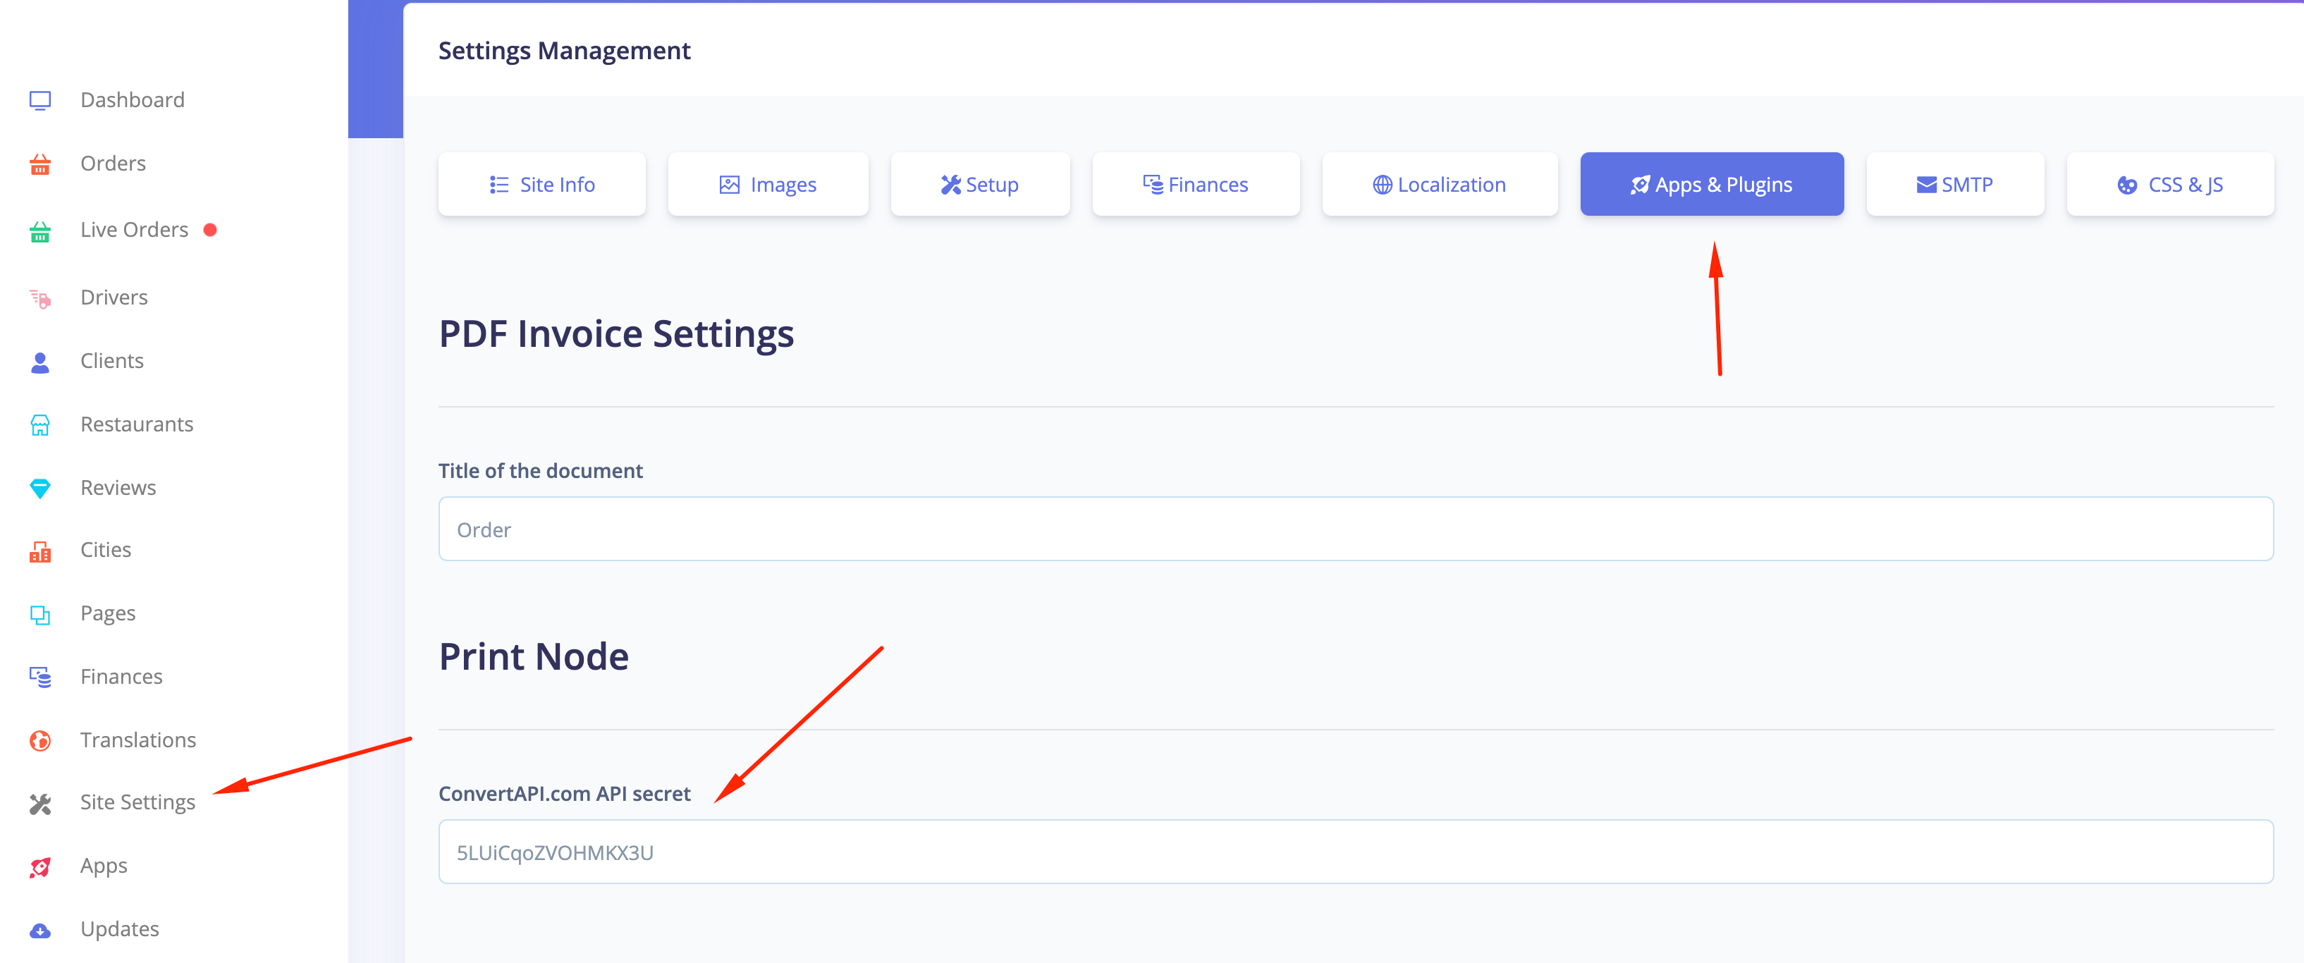
After the module is installed, if you go to "Settings->Apps" you will see the "PrintNode" section.

There you should enter the "Convert API" secret. https://www.convertapi.com/
Convert API is used for invoice to pdf creation in runtime. This setup is optional.
Setup as vendor
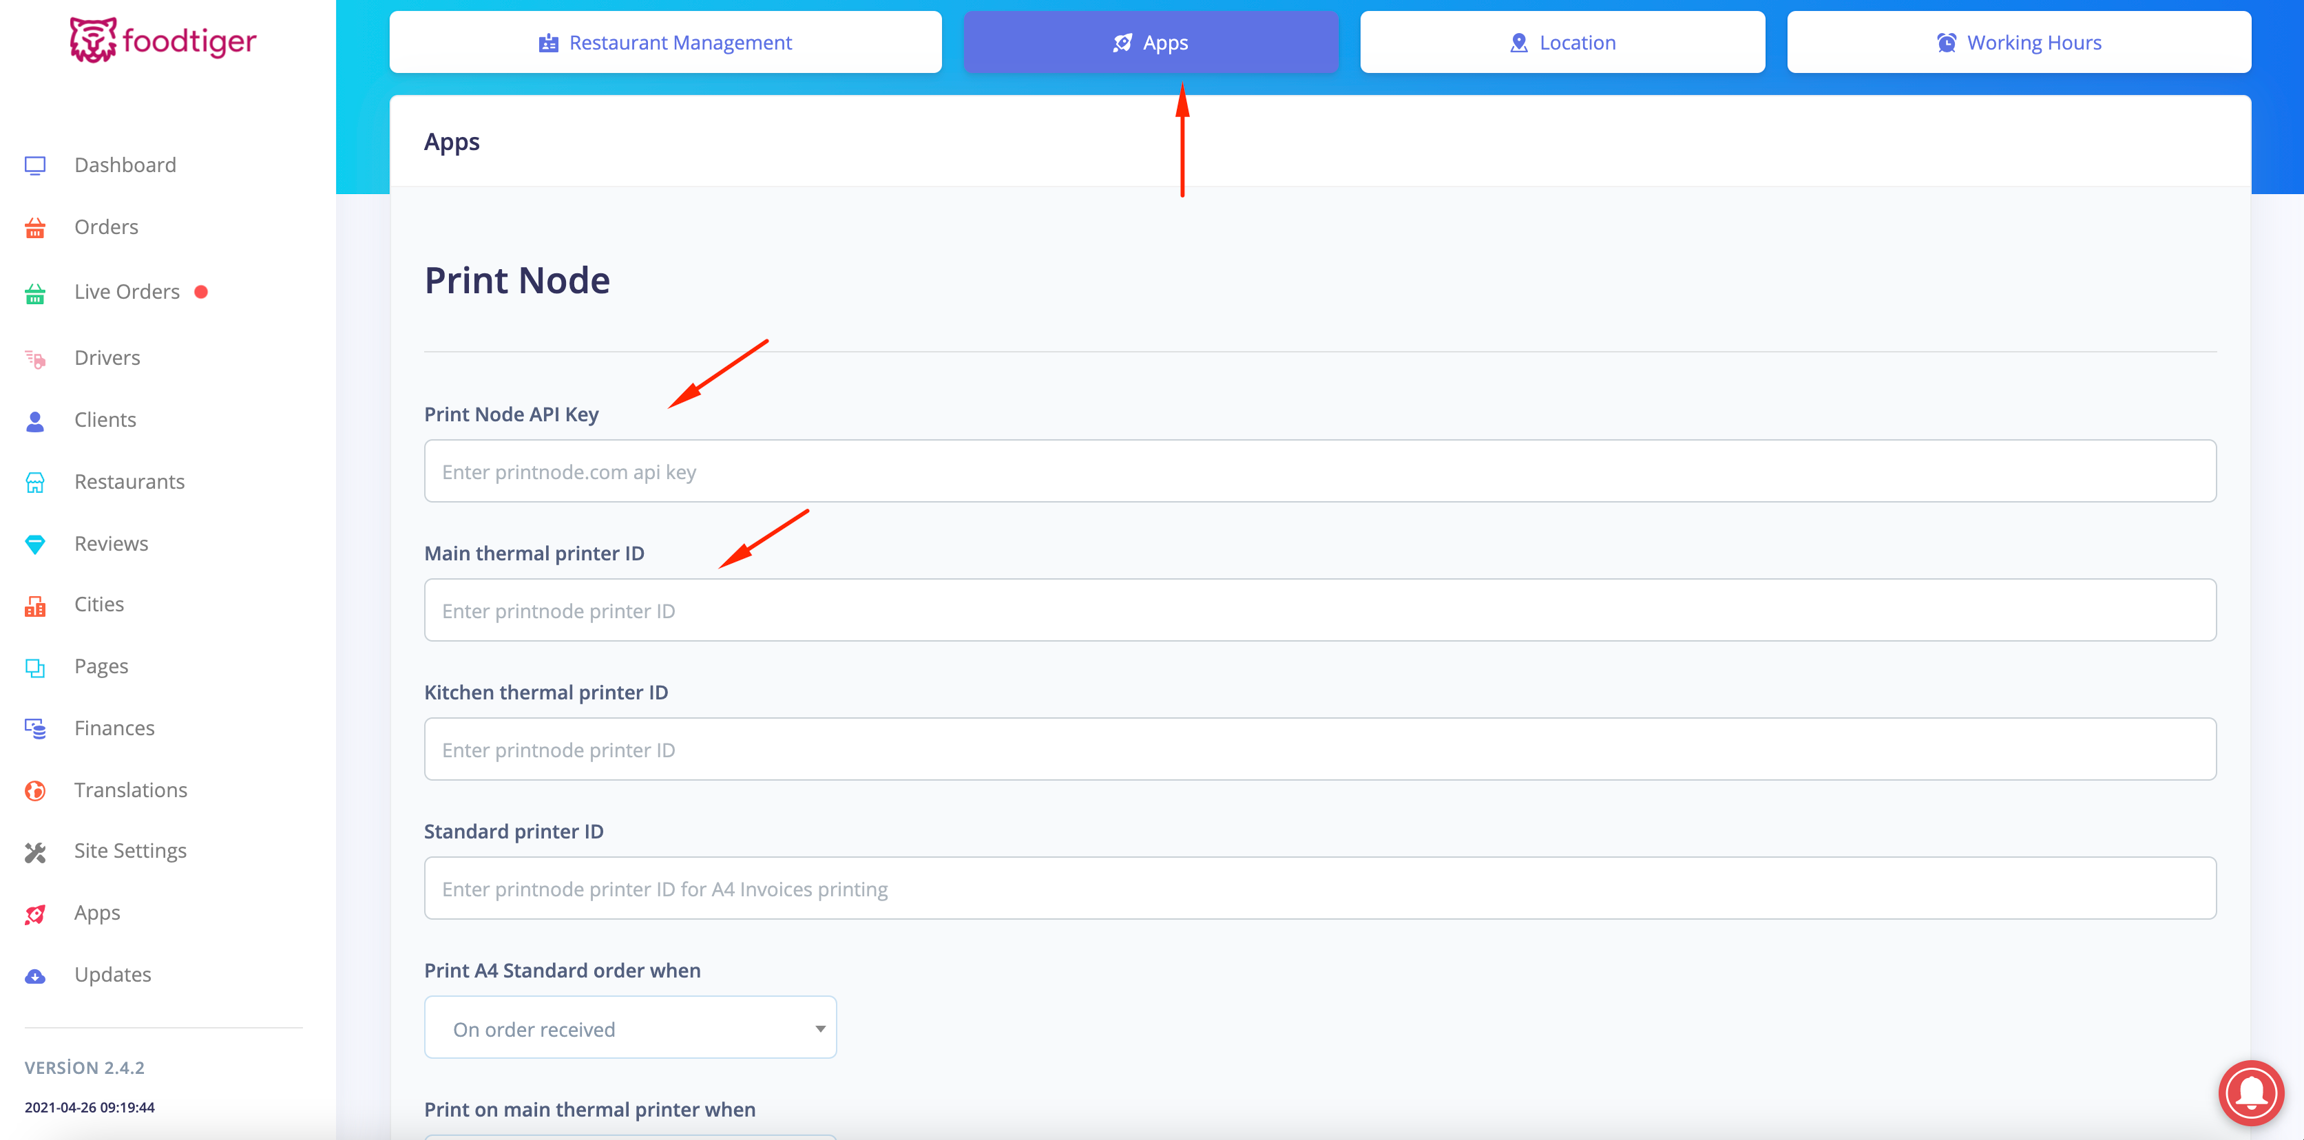
When vendors go to their management site ( or you as admin to the restaurant setup ), in the apps section they will be able to set up Print Node ( https://www.printnode.com/en ). Print Node allows us to connect any printer to the Platform with the PrintNode Client and an easy-to-use JSON API.

Create an account in Print Node and get PrintNode API Key
Create an account in PrintNode.com and choose your desired pricing. You can start free.

Enter the API Key in the Prinit Node API Key fields.
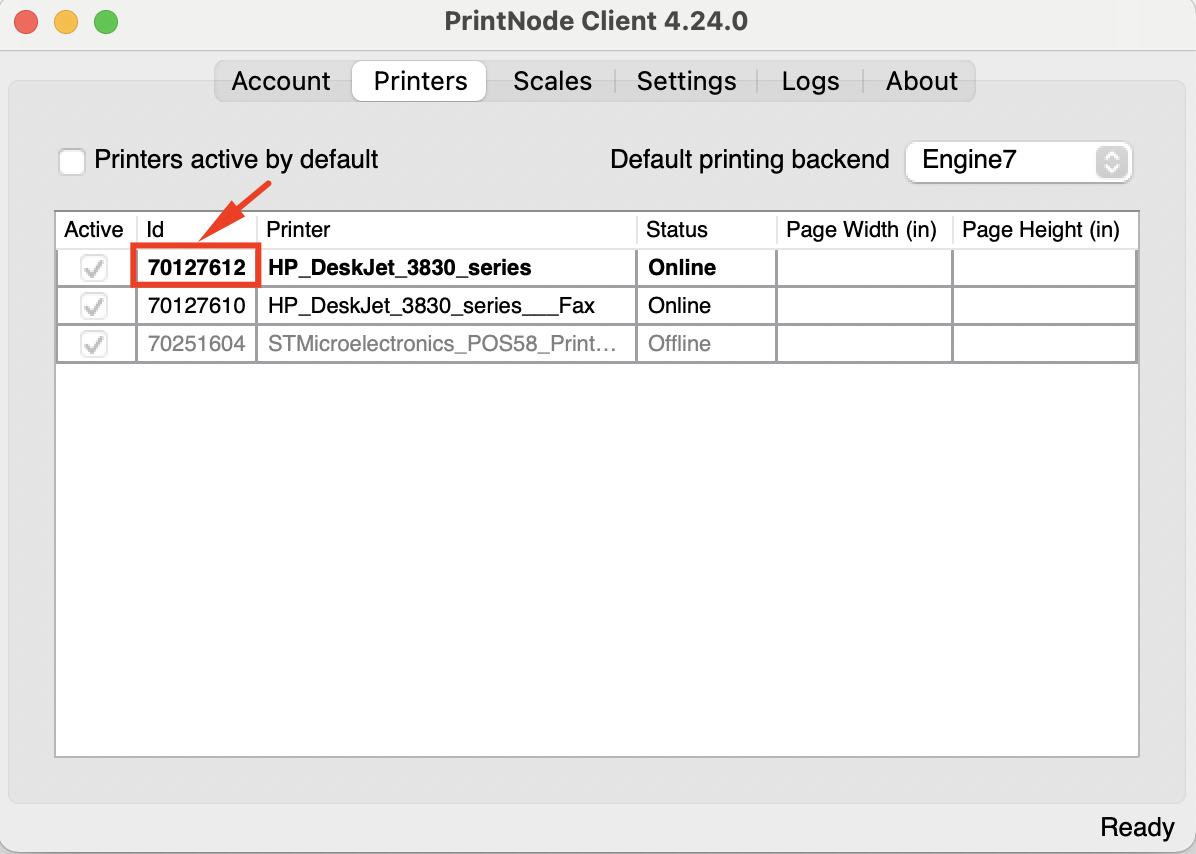
Obtain a printer id
Download the client from PrintNode.com.
Install the client and login with your user and pass.
Your printer should be connected and on power
Print node wll assign your printers an ID.
Copy the printer ID and entere the ID in Main Thermal or Kitchen Thermal or Standard Printer ID.
Setup when you want the order to be printed out

This video may help
Supported Thermal Printers
List of Supported Printers here.
But I will encourage you to first test in the demo.
Demo
In order to experience the demo, and test on an existing printer that you may have.
Create account in PrintNode.com and download their client
Get the ID of your Thermal or Standard Printer ( As I do in the video )
Get an API key
Go inside the demo of FoodTiger, POS Cloud, or WhatsApp food and login as admin@example.com | secret
Then go to restaurants, and choose some of the demo restaurants
Enter your API key and Printer ID
Do a demo order for that restaurant
You should get the order prined on your printer
Remove the printer id and the API key from the demo site
Delete the API key from PrintNodel.com
Last updated